Article content
During June – in some regions of Slovakia even until the beginning of July – we can finally see the first results of our months-long effort for a rich and healthy home-grown harvest. It is tomatoes that appear most often in our gardens. But is there any way to literally help them in the final stretch to achieve an even higher yield? The answer is yes! A grower advised a simple step on how to do it!
Every plant can have more tomatoes
Do you want to help your tomatoes? It’s quite simple – take a sharp knife or scissors and remove the lower leaves of the plant. This seemingly inconspicuous act can have a fundamental impact on your yield for several reasons.
Plentiful plants with little fruit
Leaves are of course necessary – the larger the green surface, the more nutrients and moisture the plant can absorb for its growth. However, when plants are ready to fruit and you let them overgrow, we often encounter that lush green plants with large and healthy leaves produce only few fruits and those fruits also do not taste as good as we would expect.
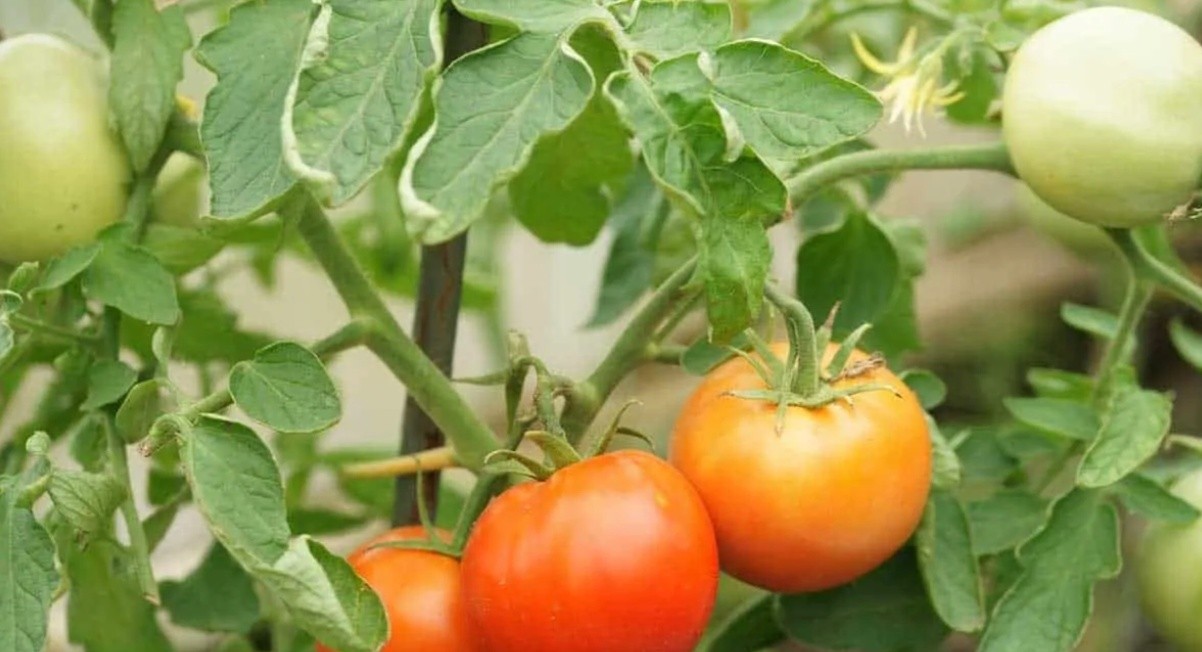
“Removing the lower leaves leads to a redirection of energy – you give the plant a signal that instead of expanding it must invest in producing fresh fruits. After removing the lower leaves we often observe faster ripening of the fruits!”
They need more air
Large leaves obstruct air circulation. Tomatoes in the ripening and maturing stage are much more demanding of oxygen supply and when they do not receive it as needed, the evaporation of moisture slows down, which is one of the main causes of fungal diseases including the dangerous “late blight – Phytophthora”, which will reliably destroy your entire crop.
The lower leaves are most susceptible to damage
During encasement or under their own weight the lower leaves easily break, get damaged, or simply bend down to the ground. This leads to the decay of green tissue and creates an entry point for diseases and infections, which slowly climb up the plant via the leaves.
Which leaves should be removed, when and how?
When you see yellow spots appearing on the leaves, they must be removed as soon as possible regardless of whether they are at the bottom or higher on the plant – usually they first appear where there is less airflow and more moisture, i.e. the lowest ones.
In addition to removing the lower leaves (even the healthy ones) and leaves that show signs of infection, also remove all dry, withered or damaged leaves that unnecessarily exhaust the plant. It should be added that leaves may wither because the plant simply no longer needs them. Such leaves, however, should be removed as early as possible because they are literally a gateway for infections. Do not forget that leaves that permanently touch the ground pose the same risk to the plant.
Why the lower leaves should be removed:
The plant becomes airier – you literally open it up to oxygen supply, you stimulate proper evaporation of moisture and thus you will protect the tomatoes from the onset of diseases that particularly thrive in warm, humid and dense growth.
You reduce the vegetative mass of the plant, which during fruit ripening rather hinders than helps. You reduce nutrient consumption for the green parts of the plant and cause a redirection of energy to the formation and ripening of the fruits.
How to do it correctly?
Under no circumstances remove the lower leaves if you have just planted the plant – by removing the lower leaves you could completely disturb the adaptation process to the new location. On a new site leave the plant for at least 10 days and start removing the lower leaves cautiously.
Before you start removing leaves, carefully inspect all the leaves. For example, if you want to remove the lower leaves because they have started to yellow and wither, it is likely that the infection has reached the higher rows of leaves as well – inspect them thoroughly and always remove the infected leaves first.
Gardener’s tip:
The minimum you can do for the plant is to remove the lower leaves on the north lower side. These leaves are almost constantly in the shade and minimally contribute to the process of photosynthesis.
There is no need to rush removing leaves and it is better to do it gradually rather than all at once. I recommend first removing the lowest pair of leaves, wait 2-3 days and remove another pair. Cut the leaves with a sharp knife so that the wound is as small as possible. Do this during a sunny day in the morning hours. The wound will heal much faster this way and you will prevent the risk of infection. Be careful not to remove too many leaves at once – do this at most twice a week, removing 2 – at most 3 leaves at a time.
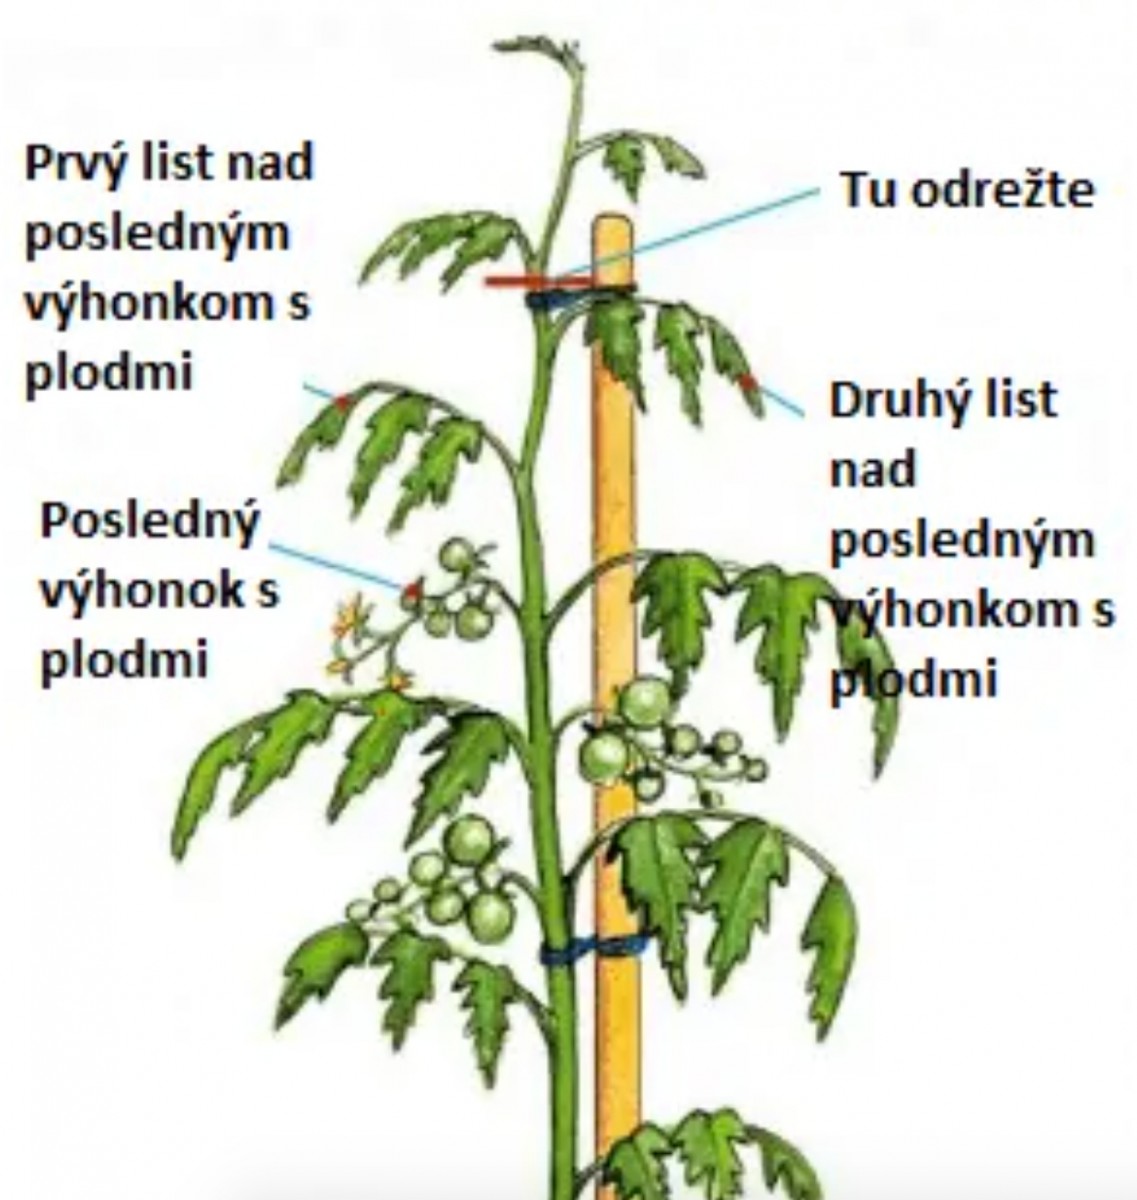
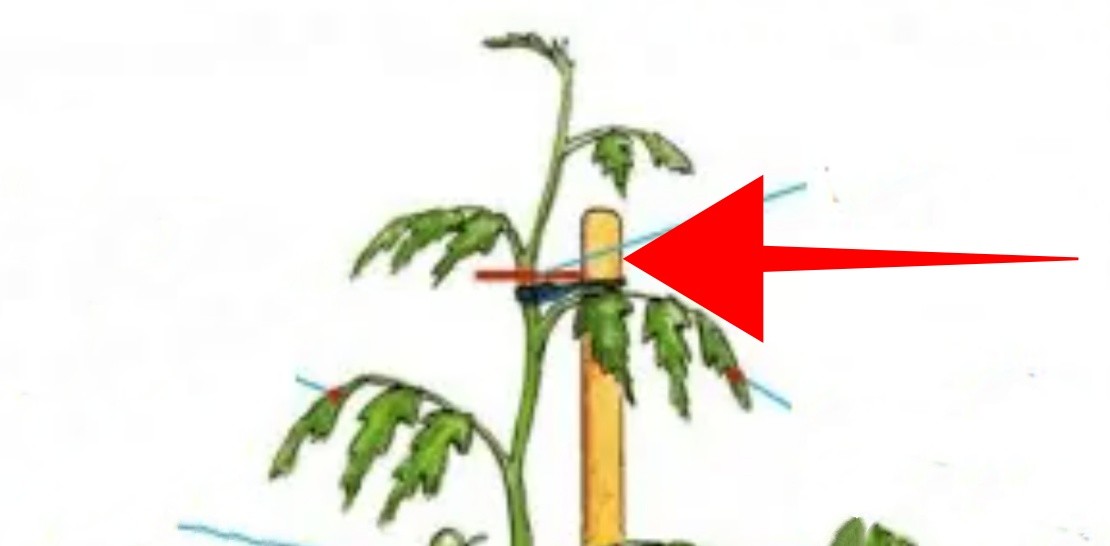
Remove the top at the end of the season

By removing the top in the correct way you ensure that the fruits can ripen and the plant does not exhaust itself on further growth, but rather on the aforementioned ripening of the last fruits.