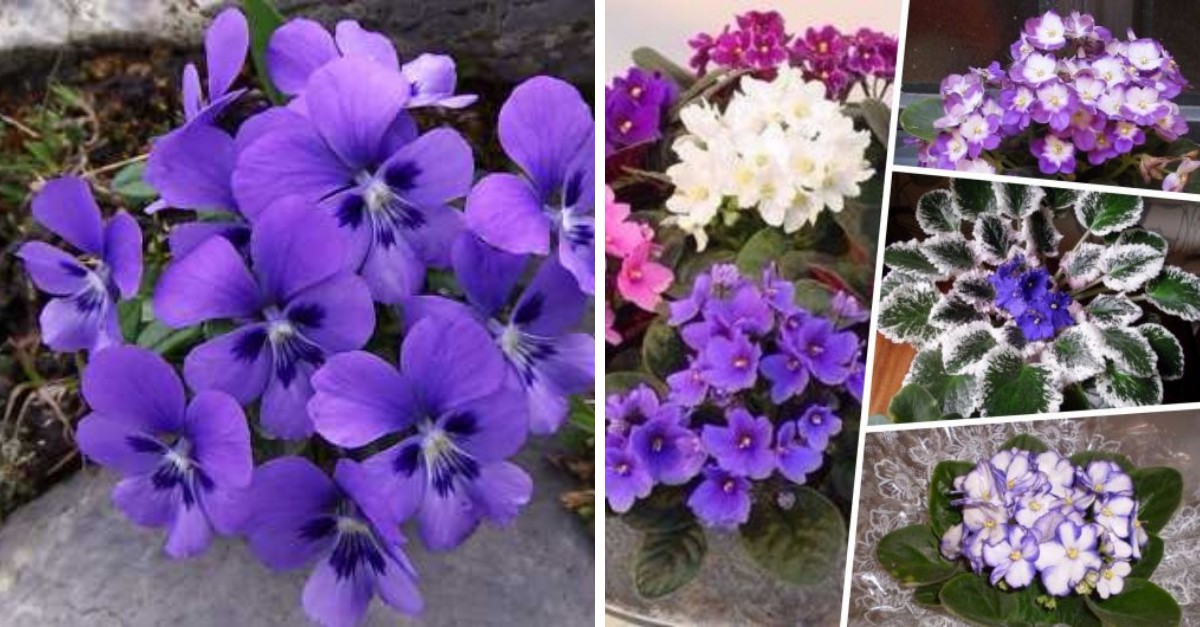
Article content
African violets belong to very popular and undemanding houseplants. But did you know they look much better than in an ordinary flowerpot when planted together in a colorful trough? If you’re into ecology, you’ll also care that it’s possible to grow African violets in plastic beverage bottles that you might otherwise have long ago thrown into sorted waste. This way you help nature a bit and your home will look very original.
Propagating violets and growing in a flowerpot
Violets are indeed very cheap flowers, but many of us are pleased when we manage to multiply the plants. And besides, if you have the chance, you’ll certainly save a few crowns. Prepare a beautiful colorful elongated flowerpot or trough into which you will plant the seedlings. African violets reproduce very easily by simple cuttings. There is really nothing complicated about the cutting process. Just find a well-developed leaf on the parent plant. Cut this leaf off with a knife as close to the soil as possible so that you separate it from the plant with the stem.
Then just prepare the right container in which you will grow the African violet, fill it with potting soil for houseplants and place humus at the bottom. On the surface of the prepared container place the cut leaf and cover its stem with soil. Moisten the entire soil, but be careful that water does not get on the surface of the leaves. During the first 30 days it will definitely not be possible to observe any signs of life. The plant will build a new root ball from the leaf under the soil. Protect violets, especially young ones like this, from drafts and direct sunlight that could burn the plant. They like diffused light but tolerate partial shade quite well.
Growing violets in bottles
If you are here to read how African violets can be grown in PET bottles, that’s what we’ll cover now. Even for growing violets in plastic bottles it is necessary to choose a place out of direct sunlight. Violets thrive perfectly at temperatures as low as 13 ° C and also tolerate 28 ° C well. Remember that when planting into plastic bottles you must make holes in the bottles. It is necessary for the plants to be able to drain excess water away. A very useful aid is also a simple watering system that can be achieved by correctly rotating the bottles. You only need to cut two parts from the PET bottles and insert them into each other so that the plants can self-water. Keep in mind that one part of the bottle must be slightly smaller than the other, but not significantly smaller so that it would fall through and fall into a large amount of water. Pour water into the bottom, place the substrate in the upper part and plant the violets. The last thing missing for functional watering is drilling holes in the bottom of the container for placing the fabric string.
Half of this string must be submerged in the water and the other half should be in the plant’s substrate, otherwise the self-watering of the plants will not work. The plant will be able to draw through the thread only as much water as it needs. You therefore do not have to worry about the correct amount of watering. It is plenty sufficient if you only ensure that there is always water in the lower part of the bottle. If you grow violets in a larger bottle, you can run two strings instead of one. This will certainly not harm the plants.
If you decide to use bottles without the self-watering system as a regular flowerpot, place small pebbles or gravel at the bottom of the bottle over the holes to prevent the roots from constantly lying in water. Those could very quickly start to rot. Saving a rotting plant is almost impossible, although you can try. Place humus on the drainage, which should reach up to half the container. The last layer is the substrate, which should be filled up to just below the rim of the bottle. Then just plant the violet, give it enough water to settle in well and you can enjoy its flowering color.