Beef Bacon: Discover A Delicious Pork Alternative

beef bacon

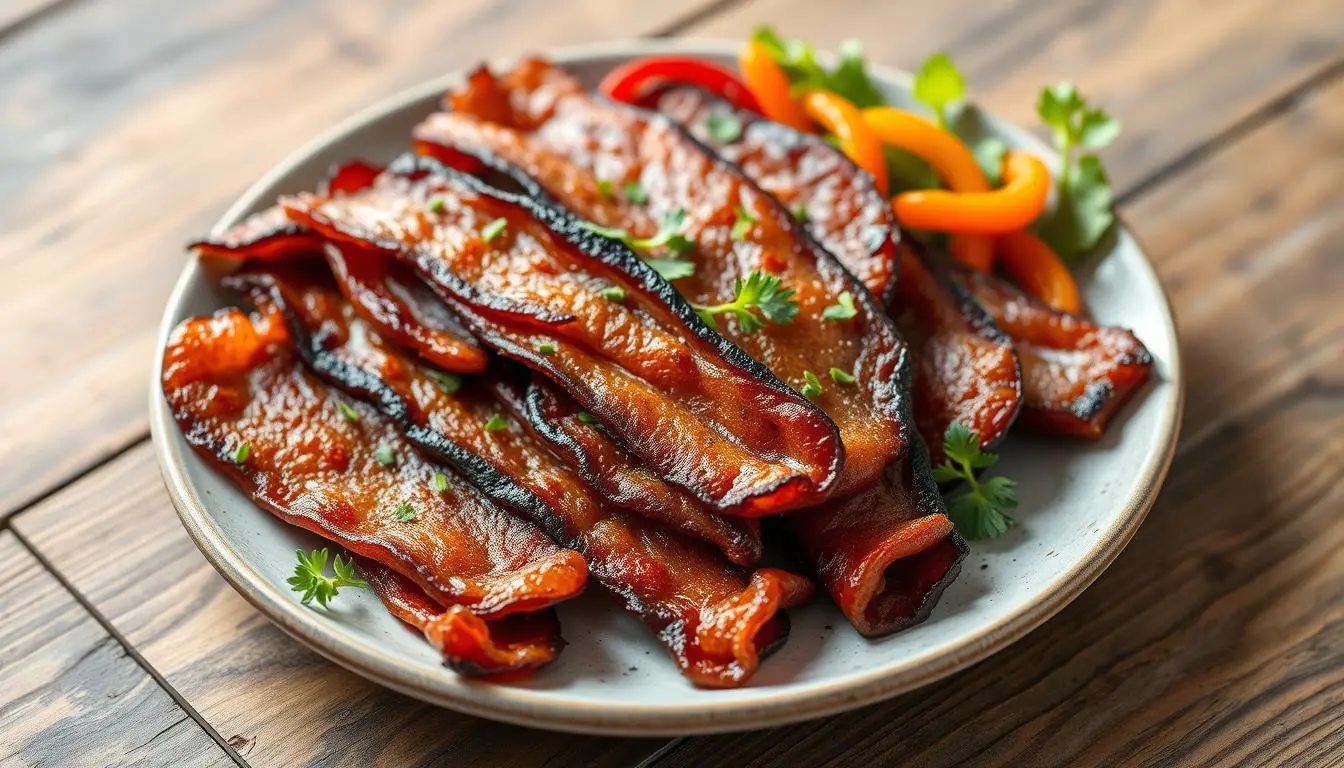
Beef bacon is a tasty twist on traditional pork bacon. It’s packed with protein and offers a unique flavor. Unlike pork bacon, it’s made from beef cuts like the belly, brisket, and round. This makes it a great choice for those who want to eat healthier or add more protein to their meals. Pork bacon has always been a favorite for breakfast. But it’s becoming more popular. It’s great in many dishes, from sandwiches to salads. If you love bacon or want to try something new, beef bacon is a flavorful option that will excite your taste buds. Key Takeaways Beef bacon is a lower-fat alternative to traditional pork bacon, with a higher protein content. It can be made from various cuts of beef, such as the belly, brisket, and round. Offering a richer, more robust flavor than pork bacon, it’s a versatile option that works well in many dishes, from breakfast to salads. For those looking to enhance traditional recipes or try new flavors, beef bacon is an excellent choice. What is Beef Bacon? Beef bacon is a flavorful twist on the classic pork variety. Made from cuts like the round or brisket, it has a smoky, salty taste similar to pork bacon but with a distinctly beefier flavor. A Healthier, Protein-Rich Option With 6 grams of protein per slice, beef bacon surpasses pork bacon’s 2 grams, making it a more protein-packed option. Additionally, it contains fewer grams of fat per cooked slice, making it a leaner choice for those seeking a healthier alternative. The curing and smoking process gives beef bacon its signature salty, savory taste, which appeals to those who don’t eat pork yet still enjoy the taste of bacon. Nutrient Beef Bacon Pork Bacon Protein (per slice) 6 grams 2 grams Weight (per cooked slice) 28 grams 11 grams Fat Content Lower Higher   Beef bacon is popular in the Middle East, available since the early 2000s. It meets the dietary needs of those following Islamic law. Its demand has made it widely available in supermarkets and stores across the region. Looking to boost your protein intake or try new charcuterie options? This delicious twist on a classic is sure to please your taste buds. Why Choose This Alternative? This bacon is a tasty and healthy option compared to traditional pork. With less fat and more protein, it’s better for those watching their diet. For instance, Pederson’s product has 6 grams of protein per slice, surpassing the 2 grams found in pork. Moreover, it retains less fat after cooking, weighing in at 28 grams per slice, while pork loses weight down to 11 grams. This makes it an excellent choice for those who want protein without excess fat. Additionally, this option is perfect for those who don’t eat pork. With its smoky flavor, it can be incorporated into many recipes, making it a versatile and tasty choice for a wide range of diets. Nutrition Comparison Beef Bacon Pork Bacon Turkey Bacon Protein (per slice) 6g 2g 6g Fat (per slice) 4g 10g 3g Calories (per slice) 80 120 50   Turkey bacon is another option without pork, but beef bacon tastes more like traditional bacon. Turkey bacon has 75% less fat than pork bacon, with 6 grams of protein and 50 calories in one serving. Beef bacon has more protein and similar fat levels, making it a good choice for a healthier bacon option. Cooking beef bacon is easy, like pork bacon. You can pan-fry, oven-bake, or microwave it. This makes it great for many dishes, from breakfast to sandwiches. Beef bacon is a great choice for those looking to try something new or reduce their pork intake. How is Beef Bacon Made? The Curing and Smoking Process Beef bacon comes from different cuts like the belly, brisket, and round. Pederson’s Natural Farms uses the round cut from the hind for their Uncured Hickory Smoked Beef Bacon. They cure the beef with brown sugar, salt, and vinegar, avoiding artificial additives. Celery powder is used as a natural preservative, giving the bacon a unique taste. The curing process is key for flavor and safety. Each ingredient’s amount is carefully measured based on the meat’s weight for the best taste. After curing, the beef is smoked over real hickory wood chips. This adds a smoky, salty flavor. This careful process makes beef bacon a tasty, high-protein alternative to traditional bacon. Beef bacon stays crispy without needing to be overcooked. It’s great for breakfast, sandwiches, and pizzas. It’s a good choice for those who don’t eat pork. Beef bacon contains 6 grams of protein per slice, significantly higher than pork bacon, which offers only 2 grams per slice. The curing and smoking process gives it a pink color and a strong flavor, making it a great choice for those who can’t or don’t want to eat pork. As more people seek alternative proteins, this option is both tasty and healthy. If you’re looking for something new in protein, consider this flavorful alternative to traditional pork bacon. It brings a smoky, savory taste that enhances any dish. With 28 grams of meat per cooked slice and less fat, it provides more protein and a richer flavor. Additionally, this bacon is versatile. It can be made from various cuts of beef, like the belly, brisket, and round, allowing for a range of flavors and culinary uses. Moreover, the curing and smoking process contributes to its smoky, savory, and slightly sweet profile, making it both familiar and unique. Whether you want to elevate your breakfast or add a special touch to sandwiches, this protein-packed option offers a wide variety of flavors. Try it out and see what you can create! Cooking with Beef Bacon Breakfast, Sandwiches, and More This versatile ingredient can elevate many recipes by adding a savory twist to breakfast and sandwiches. Enjoy it alongside pancakes or in a fresh salad. It cooks like traditional pork bacon; you can sizzle, broil, or bake it for a crispy texture. With … Read more

Cuisinart Ice Cream Maker Recipes-Delicious

cuisinart ice cream maker recipes

Enjoy making your own frozen treats with Cuisinart ice cream maker recipes. You can make classic flavors or try something new. This article will show you how to make ice cream, gelato, and no-churn desserts at home. You can make flavors like sour cherry, toasted marshmallow, Oreo, and lemon curd. Even decadent butterscotch chocolate cake is possible with a Cuisinart ice cream maker recipes. Learn about homemade ice cream, including custard-based, Philadelphia-style, and gelato. Find out how to get the perfect texture and flavor. You can also mix and match flavors to create your own unique treats. This guide will help you get the most out of your Cuisinart ice cream maker recipes and make your frozen desserts even better. Key Takeaways for cuisinart ice cream maker recipes Discover three main types of homemade ice cream that can be made with a Cuisinart ice cream maker: custard-based, Philadelphia-style (eggless), and gelato.   Explore a wide variety of delicious ice cream flavors, including sour cherry, toasted marshmallow, Oreo, lemon curd, and more.   Learn the importance of properly chilling the ice cream base and techniques for achieving a smooth, creamy texture.   Embrace creativity and experiment with unique flavor combinations to create your own signature frozen treats.   Discover how to use your Cuisinart ice cream maker to make not just ice cream, but also gelato and no-churn desserts.   Indulge in Creamy Homemade Delights Discover the joy of making delicious, creamy homemade ice cream with your Cuisinart ice cream maker. It’s perfect for both beginners and experienced cooks. You can make everything from classic vanilla to unique flavors right in your kitchen. Experience the Joy of Fresh Frozen Treats Get creative and make a variety of fresh frozen treats with your Cuisinart ice cream maker. Try favorites like chocolate and vanilla or go for something new like lemon, raspberry, or lavender. The options are endless with this appliance. Explore a World of Flavors with Your Cuisinart ice cream maker recipes The Cuisinart ice cream maker lets you try many flavors, from old favorites to new ones. Use fresh ingredients like berries or herbs to make special treats. Enjoy creamy chocolate chip or a refreshing hibiscus sorbet. The Cuisinart ice cream maker opens up a world of homemade ice cream fun. “Homemade ice cream is the ultimate indulgence, and the Cuisinart ice cream maker makes it so easy to create your own creamy, flavorful frozen treats right at home.” Mastering the Art of Custard-Based Ice Cream Enjoy the creamy delight of custard-based ice cream, a French classic. Learn to make it with your Cuisinart ice cream maker. This will take your homemade ice cream to the next level. Unraveling the Secrets of French-Style Perfection The French make ice cream with egg yolks, milk, and cream. This creates a smooth, rich texture. It’s what makes custard-based ice cream special. Start by getting your ingredients: heavy cream, whole milk, vanilla bean, sugar, and egg yolks. Heat the cream, milk, vanilla, and sugar in a saucepan. This lets the flavors mix and simmer. Whisk the egg yolks in a bowl. Then, slowly add some hot cream to them. This is called tempering. After, put the custard back in the saucepan and stir until it thickens. Chilling is key for French-style ice cream. Chill the custard for 6 to 12 hours. This lets the flavors grow and the texture become creamy. With patience, you’ll get a delicious, homemade ice cream. “The true secret to making the perfect custard-based ice cream lies in the balance of ingredients and the dedication to the chilling process. With a little practice, you’ll be able to create a frozen treat that rivals the finest French pâtisseries.” Philadelphia-Style: The Eggless Delight Try the philadelphia-style ice cream, a simple yet delightful treat. It’s made with heavy cream, whole milk, and sugar. This mix creates a smooth, creamy texture that highlights the pure taste of dairy. Making philadelphia-style ice cream is quick, taking about 30 minutes. It doesn’t use egg yolks, so it’s fresh and light. You can add Scotch to the vanilla for an extra layer of flavor. Philadelphia is famous for its homemade ice cream. The philadelphia-style ice cream is lighter and fluffier than custard-based ice cream. It’s just as enjoyable. To keep the ice cream stable, you can use starch, sugars, and gelatin. Non-fat milk powder adds creaminess and helps it stay firm. Whether you like it simple or creamy, you can choose to add milk powder. This choice affects the taste and how long it lasts. Enjoy the simplicity and taste of philadelphia-style ice cream.   Ingredient Quantity Heavy Cream (35-40% fat) 345 grams Whole Milk 185 grams Sugar 185 grams Vanilla Extract 1 teaspoon Scotch (optional) 2 tablespoons Gelato: The Italian Twist on Frozen Decadence Step into the world of gelato, Italy’s own version of ice cream. It has more milk than cream, making it denser and velvety-smooth. This texture is perfect for melting in your mouth. Learn how to make this rich treat and take your Cuisinart ice cream maker to the next level. Discover how to mix flavors and textures to make the best gelato. Crafting Velvety Smooth Textures The secret to gelato‘s smoothness is in how it’s made. Unlike American ice cream, gelato churns slower. This makes it creamy and dense. Gelato has more milk, giving it a deeper flavor.   Sicilian gelato uses corn starch for extra creaminess.   Change the corn starch amount to get the texture you like, from smooth to chewy.   Try out gelato‘s bright flavors, like lemon, chocolate, and hazelnut. Learn the secrets of this Italian treat and turn your Cuisinart into a gelato paradise. No-Churn Ice Cream: Effortless Indulgence Explore the world of no-churn ice cream and enjoy making delicious frozen treats easily. This method uses just a few ingredients. It’s perfect for those who want to make easy homemade ice cream without extra gear. The secret to effortless ice cream is mixing sweetened condensed milk with whipped cream. … Read more

Easy Chicken Brine Recipe for Juicy Results

chicken brine recipe

Discover the secrets to the juiciest, most flavorful chicken you’ve ever tasted with this easy chicken brine recipe. In as little as 2 hours, you can transform plain chicken breasts, thighs, or a whole bird into a moist and tender masterpiece. The science behind brining reveals how this simple method can unlock the full potential of your poultry, leaving you with chicken that’s bursting with savory goodness in every bite. Key Takeaways for chicken brine recipe Brining is a quick and easy way to ensure juicy, flavorful chicken every time   The brine solution of salt, sugar, and water penetrates the meat, enhancing moisture and taste   Brining times vary from 2 hours for skinless breasts to 4 hours or more for bone-in pieces and whole chickens   This recipe yields 4 brined chicken breasts, with each piece weighing approximately 8 ounces   Brined chicken is higher in nutrients, with 177 calories, 12g carbs, 24g protein, and 3g fat per serving   What is a chicken brine recipe? A chicken brine is a salty liquid used to soak chicken before cooking. This method, called brining, adds flavor, tenderizes the meat, and keeps it moist. The science behind brining is quite fascinating. The Science Behind Brining When chicken is soaked in a brine, the salt changes the meat’s proteins. This makes the chicken juicier and more tender. The brine also carries flavors like herbs, spices, and citrus into the chicken. Brining is a key technique for chefs to make chicken dishes flavorful and moist. The brining process involves soaking the chicken in a mix of water, salt, and sometimes sugar. The time depends on the chicken cut. Chicken Cut Brining Time Boneless, Skinless Chicken 2-6 hours Bone-in Chicken with Skin 2-8 hours Whole Chicken 8-24 hours   Understanding chicken brining science helps you make the most tender and flavorful chicken every time. chicken brine recipe: The Ingredients Making a tasty and juicy chicken dish begins with the right brine ingredients. The main parts of this brine solution are water, kosher salt, soy sauce, sugar, and olive oil. Water is the base, letting the other ingredients mix well. Kosher salt tenderizes the meat and keeps it moist. Soy sauce adds flavor and saltiness. Sugar brings a touch of sweetness and helps the chicken brown. Olive oil makes the chicken moist and tender. To make the seasoning for chicken brine even better, add garlic, fresh herbs, peppercorns, and citrus. These extras give the chicken a rich flavor and aroma. This makes the meal even more enjoyable. Brine Ingredients Quantity Water 8 cups Kosher Salt 1/2 cup Honey 1/4 cup Dried Bay Leaves 3 Garlic Cloves 5 Black Peppercorns 1 tablespoon Fresh Rosemary 3 sprigs Fresh Thyme 3 sprigs Fresh Parsley 3 sprigs Lemon Slices 2   With these brine ingredients, you can make a tasty and healthy brine solution. It will turn your chicken into a juicy, tender, and delicious dish. Try different herbs, spices, and citrus to find your favorite seasoning for chicken brine. Quick and Easy Brining Method Brining your chicken is a simple way to make it juicy and flavorful. You soak the chicken in a salt-based solution. This adds moisture and flavor to the meat. To make the brine, boil water, salt, soy sauce, sugar, and olive oil. This dissolves the salt and brings out the flavors. Then, let the brine cool down before adding the chicken. Step-by-Step Instructions for chicken brine recipe Brine skinless chicken breasts for 2 hours. Bone-in pieces need 4 hours. Whole chickens should brine for at least 4 hours or overnight. Use a food-grade container like stainless steel or an enameled stockpot. After brining, pat the chicken dry. This helps get the skin crispy. Brining can take 30 minutes for breasts or up to 6 hours for whole birds. The right ratio is 2 tablespoons of salt per liter of water. This makes a 3% salt solution. Too much salt can make the chicken too salty. Stick to the recommended times. Brining tenderizes the meat and makes it harder to overcook. By using this quick brining method, you can make your chicken juicy and flavorful. It’s great for any meal, from weeknight dinners to special occasions. Brining is a simple yet powerful technique to improve your chicken dishes. Benefits of Brining Chicken Brining chicken opens up a world of flavor and juiciness. This simple method adds flavor, tenderizes the meat, and keeps it moist. You’ll get the most tender and juicy chicken you’ve ever had. One big benefit of brining chicken is the flavor boost it gives. The brine seasons the meat all the way through, not just the surface. This means every bite is full of savory goodness. Users like Jon, Ryan, Alexandra, and Chris P. love this extra flavor. Brining also tenderizes the chicken. The salt in the brine breaks down the protein, making the meat tender and juicy. People have shared how brining made their chicken taste better and stay juicy. Lastly, brining helps the chicken retain moisture during cooking. This prevents it from drying out. You can be more flexible with your cooking because the brine keeps the chicken moist and flavorful. In summary, the benefits of brining chicken are clear. You’ll get juicy, tender, and flavorful results every time. Whether you choose a wet or dry brine, the effort is worth it for the delicious results. Customizing Your chicken brine recipe The basic flavored chicken brine recipe is simple. It includes water, salt, soy sauce, sugar, and olive oil. But, you can add different aromatics to change the flavor. Try garlic, peppercorns, fresh herbs like rosemary and thyme, citrus, and a bit of honey or brown sugar for sweetness. These brine ingredients add new tastes. They work well with many chicken dishes. You can use them for roasted whole birds or grilled chicken breasts. Flavor Variations Want a unique brine customization? Here are some flavor ideas: Flavor Profile Brine Ingredients Herb-Infused Rosemary, thyme, sage, bay leaves Citrus-Kissed Lemon, … Read more

Sourdough Discard Recipes You’ll Love

sourdough discard recipes

Sourdough baking is back in style, winning over food lovers everywhere. But, what to do with the leftover starter? Luckily, sourdough discard can be used in many tasty ways, especially for breakfast. This article will explore the tasty world of sourdough discard recipes, answering your questions. Key Takeaways 100+ sweet and savory sourdough discard recipes, with 68 recipes already compiled   Sourdough discard recipes can be made quickly, usually in a few hours   Sourdough discard can be stored for up to 2 weeks in the fridge   Sourdough discard is suitable for recipes with flour and liquid, like quick breads, cookies, and batters   Sourdough starter must be at least 7 days old to use the discard   Embrace the Flavor: Sourdough Discard Recipes Discover the amazing uses of your sourdough discard. It’s more than just leftover starter from baking bread. It can make a variety of dishes, from savory to sweet, taste amazing. Tantalizing Flavors Await Craving something tangy? Try sourdough discard pancakes. Or maybe you want something crispy? Sourdough discard crackers are perfect. For a fluffy treat, sourdough discard waffles are a great choice. Think about making a sourdough discard pizza crust for your next pizza night. Or, whip up some sourdough discard biscuits for a family favorite. Sourdough discard can do it all, adding unique flavors to your dishes. “Sourdough discard is a gift that keeps on giving. It’s the secret ingredient that can transform your baking and elevate your culinary creations to new heights.” Let your creativity shine with sourdough discard. It’s a game-changer for both savory and sweet dishes. The results are delicious and endless. Mastering the Art of Sourdough Discard Adding easy sourdough discard recipes and quick sourdough discard recipes to your cooking is easy. Sourdough discard, the leftover starter, is great in many dishes. The trick is to mix it right with other ingredients to keep the dish’s texture. When using sourdough discard, cut the flour by half a cup and the liquid by a quarter cup for each cup of discard. This helps your baked goods stay right and adds sourdough’s unique taste. Get creative with easy sourdough discard recipes and quick sourdough discard recipes. Try them in everything from pancakes to cookies and bread. With a bit of trying, you’ll get good at using this ingredient in your cooking and baking.   Recipe Total Time Yield Nutrition (per serving) Sourdough Discard Pancakes 25 minutes 4-6 servings Calories: 250, Sugar: 6g, Fat: 10g, Carbs: 32g, Fiber: 1g, Protein: 7g   Enjoy the special flavors and textures that easy sourdough discard recipes and quick sourdough discard recipes add to your cooking. By learning to use sourdough discard, you’ll open up a world of tasty dishes and impress your taste buds with every meal. Savory Delights: Sourdough Discard Crackers and More Discover the amazing uses of sourdough discard in cooking. From tasty sourdough discard crackers to unique dishes, the options are endless. This ingredient is full of potential, waiting to be explored. Crispy Perfection: Sourdough Discard Crackers Enjoy the crunchy goodness of homemade sourdough discard crackers. They need just three things: sourdough discard, butter, and salt. You can make them in 5 minutes and bake them in 20, ready to eat. To get them crispy, spread the batter thin on the baking sheet. After baking, add your favorite seasonings. Try herbs, spices, or cheese. Serve them with dips or enjoy them alone for a tasty snack. Savory Surprises Galore But there’s more than just crackers. Sourdough discard can be used in many savory recipes. Make fluffy pancakes, waffles, or even meatballs. It adds flavor and nutrition to your meals. Use sourdough discard as a binder or leavening agent. It also adds a tangy taste. Let your creativity shine and turn simple meals into special dishes with this versatile ingredient. “Sourdough discard recipes not only reduce waste but also offer health benefits, making them a wonderful addition to a balanced diet.” Make delicious, sourdough discard-based dishes that will wow everyone. Explore the savory side of sourdough and discover new flavors in your cooking. Breakfast Bliss: Sourdough Discard Pancakes and Waffles Make your breakfast better with sourdough discard pancakes and sourdough discard waffles. These sourdough discard breakfast recipes are great for saving food and taste amazing. They make your breakfast special. Sourdough discard makes your pancakes and waffles extra special. It makes them light, fluffy, and full of flavor. You’ll feel like you’re eating at a fancy restaurant. Sourdough Discard Pancakes Try the perfect mix of tangy and sweet with these sourdough discard pancakes. They’re thick, soft, and delicious. The sourdough adds a special depth to the taste. You can make these pancakes ahead of time and freeze them for up to three months. They’re perfect for busy mornings. Top them with berries, maple syrup, or powdered sugar for a great start to your day. Sourdough Discard Waffles Take your breakfast to the next level with sourdough discard waffles. They’re amazing whether you make them quickly or let them ferment overnight. The sourdough makes them special. The batter is easy to mix up. It has milk, melted butter, eggs, flour, sugar, baking powder, and salt. The sourdough adds a tangy flavor that makes the waffles stand out. Enjoy these sourdough discard waffles hot with maple syrup, cinnamon sugar, or fresh fruit. They’re endless possibilities for a delicious breakfast. “The sourdough discard pancakes are absolutely delicious! I can’t believe how light and fluffy they are, with a subtle tang that sets them apart from regular pancakes. This recipe is a game-changer for my breakfast routine.” Try these sourdough discard breakfast recipes for flavor and to reduce waste. Whether pancakes or waffles, you’ll get a tasty and satisfying breakfast. It will make you feel ready to take on the day. Sweet Indulgence: Sourdough Discard Baked Goods Discover the secret of your sourdough discard. It’s the leftover starter from your sourdough culture. This can add amazing flavor and texture to baked goods like muffins, cakes, and pies. … Read more

Brookie Recipe: Delicious Brownie-Cookie Perfection

brookie recipe

Explore the world of brookies, a mix of brownies and cookies. This simple brookie recipe combines great flavors and textures. It’s the perfect dessert for any event. We’ll show you how to make a fudgy chocolate brookie bar that will impress everyone. Key Takeaways brookie recipe Brookies are a delightful dessert that combines brownies and cookies into one irresistible treat.   This easy recipe yields 20 bars, perfect for sharing with family and friends.   The recipe features a cookie layer and a brownie layer, offering a delicious blend of textures.   Brookies can be customized with various add-ins, such as nuts or different types of chocolate chips.   Baking tips ensure the perfect brookie, from choosing the right pan size to cooling the bars completely before cutting.   Irresistible Brookies: The Cookie-Brownie Hybrid A brookie is a dessert that combines brownies and cookies. It has a rich, fudgy brownie base and a sweet, chewy cookie layer. This mix creates a treat that everyone loves. What is a Brookie? A brookie is a special dessert that mixes brownie and cookie flavors. It has a chocolatey base and a chewy cookie on top. This makes it a unique and tasty treat. Understanding the Cookie Brownie Hybrid The brookie is a mix of two classic desserts. The brownie layer is rich and fudgy. The cookie top adds crunch and chewiness. This mix of textures and flavors is perfect for both cookie and brownie fans. Why Brookies Are the Ultimate Dessert Brookies are the ultimate dessert for several reasons: They combine the decadence of a brownie with the comfort of a cookie.   Their unique texture and flavor make them a hit at any event.   Brookies are versatile, letting you try different flavors and customizations.   They’re easy to make and bake, making them a convenient dessert choice.   Brookies are the perfect dessert for anyone with a sweet tooth. They offer a delicious mix of classic flavors and textures in every bite. Brookie Recipe Ingredients: A Delightful Combination To make the perfect brookie, you need a mix of brownies and cookies. This recipe has all you need for the brownie and cookie layers. Plus, some extras to make it even better. For the Brownie Layer ¾ cup melted salted butter   1½ cups granulated sugar   3 extra-large eggs   2 tsp pure vanilla extract   ⅔ cup unsweetened cocoa powder   1 cup all-purpose flour   ½ tsp sea salt   ½ tsp baking powder   For the Cookie Layer ¾ cup room temperature salted butter   ½ cup granulated sugar   ½ cup dark brown sugar   1 extra-large egg   1 tsp pure vanilla extract   ½ tsp baking powder   ½ tsp sea salt   1¼ cups all-purpose flour   1 cup semi-sweet chocolate chips   1 cup milk chocolate chips   Additional Ingredient Options Want to make your brookie recipe even more special? Try adding chopped nuts, a caramel swirl, or different chocolate chips. This will give it a unique twist. With these ingredients, you can make a brookie that everyone will love. It’s perfect for any occasion or just because. Step-by-Step Guide: Baking Decadent Brookie Recipe Get ready to make the ultimate cookie-brownie fusion. This guide will help you bake delicious brookies. Your taste buds will thank you. Preparing the Brownie Layer First, preheat your oven to 350°F (175°C). Grease a 9×9 inch baking dish. In a bowl, mix melted unsalted butter and granulated sugar until smooth. Add eggs and vanilla extract, stirring well. Then, sift in cocoa powder, flour, salt, and baking powder. Fold these dry ingredients into the wet mixture gently. Pour the brownie batter into the dish, spreading it evenly. Making the Cookie Dough In another bowl, cream together softened butter, brown sugar, and granulated sugar for 5 minutes. Beat in eggs and vanilla extract. Add flour, baking soda, and salt, mixing until a dough forms. Fold in chopped dark chocolate chunks or semi-sweet chocolate chips. Layering the Brownie and Cookie Mixtures Spoon cookie dough over the brownie batter, spreading it evenly. Make sure the cookie dough covers the whole surface without gaps. Bake for 30 minutes, then remove the foil or parchment paper. Bake for another 15-20 minutes, until edges are golden and a toothpick comes out clean. Let them cool before cutting into squares. Enjoy the perfect mix of fudgy brownies and chewy cookies in every bite. The aroma of these decadent treats will fill your kitchen. Baking Tips for the Perfect Brookie Recipe Making the perfect brookie recipe needs attention to a few important details. First, pick the right 9×13-inch baking dish. It’s key for even cooking. This lets both the brownie and cookie layers rise well and get a great crust on top. To check if your brookies are done, use a toothpick in the center after baking time. If it comes out with a few moist crumbs, they’re ready. Avoid overbaking to prevent dry, crumbly layers. After baking, let the brookies cool completely in the dish before cutting. This step is crucial. It makes sure the layers stay together well, making cutting easy. Choose a 9×13-inch baking dish for even cooking and a perfect crust. Insert a toothpick into the center to check for doneness – moist crumbs indicate they’re ready. Allow the brookies to cool completely in the dish before cutting into bars.   By following these simple tips, you’ll make the most delicious brookies. They’ll be so good, your loved ones will ask for more. Enjoy every step and every bite of these amazing cookie-brownie treats! Mouthwatering Brookie recipe Variations to Explore Brookie recipes are a fun way to get creative in the kitchen. You can add many flavors and try different chocolates. This makes brookies a great canvas for your baking skills. Customizing with Flavor Additions Make your brookies even more special with extra ingredients. Try adding chopped nuts for a nice crunch. A bit of caramel or peanut butter can also make … Read more

Easy Salmon Cakes Recipe: Tasty Homemade Patties

salmon cakes recipe

Take your seafood to the next level with this Easy Salmon Cakes Recipe. Make tender, flavorful patties right at home. These salmon cakes are perfect for any meal, from appetizers to main dishes. They’re made with quality canned salmon, seasoned breadcrumbs, and a few simple ingredients. Key Takeaways This easy salmon cakes recipe yields 13 to 14 delicious homemade patties   The preparation time is approximately 30 minutes, with a cook time of around 45 minutes   Each serving of the salmon cakes contains roughly 157 calories, with a macronutrient breakdown of 5g of carbs, 9g of protein, and 11g of fat   The recipe includes 1/4 cup of minced fresh parsley as one of its key ingredients   The Easy Salmon Cakes Recipe has garnered over two million pageviews, demonstrating its popularity and appeal   What are Salmon Cakes? Salmon cakes, also known as salmon patties, are a tasty seafood dish. They are made with flaked salmon, breadcrumbs, and other ingredients like onions, eggs, and seasonings. These savory cakes can be pan-fried or baked. They are great as a main course, appetizer, or part of a larger meal. Salmon cakes are a good way to use leftover cooked salmon or canned salmon. This makes them a versatile and affordable choice. Definition and Description Salmon cakes are essentially seafood patties or cakes. They are made by mixing flaked salmon with breadcrumbs, eggs, and seasonings. The mix is shaped into small, round or oval cakes. These salmon cakes are cooked until they are golden brown and crispy on the outside. They stay moist and flavorful inside. You can serve them as a main dish, with a salad or vegetables, or as a tasty appetizer or snack. The main ingredients in salmon cakes are flaked salmon, breadcrumbs, eggs, and seasonings. Ingredients like onion, parsley, and spices are also used. The mix is shaped into patties, about 3 inches in diameter and 1 inch thick. Then, they are pan-fried or baked until they are golden brown and crispy on the outside. Why Choose Homemade Salmon Cakes? Canned salmon is a cheap pantry item that turns into tasty homemade salmon cakes. These are also known as salmon patties or croquettes. Making them at home brings you the benefits of homemade salmon cakes and advantages of making salmon cakes at home. One big plus of making salmon cakes yourself is controlling what goes into them. You can tweak the flavors to your liking, adding herbs, spices, or lemon juice. This way, you skip the additives and preservatives found in store-bought ones. Another plus is saving money. Canned salmon is cheap, and making your own cakes saves you cash. Plus, mixing and shaping the cakes is a fun part of cooking. Benefits of Homemade Salmon Cakes Advantages of Making Salmon Cakes at Home Control over ingredients Cost savings Customizable flavors Enjoyable cooking activity Avoid unwanted additives Fresh, high-quality ingredients   Choosing to make homemade salmon cakes means you get a tasty, affordable meal. You control the quality and flavors. It’s rewarding and budget-friendly, perfect for adding seafood to your diet. Ingredients for the Perfect Salmon Cakes Recipe Making tasty homemade salmon cakes is easy with the right ingredients. You’ll need a few simple things to get started:   Ingredient Amount Canned salmon 1 (14.75 ounce) can Seasoned dry bread crumbs 1/2 cup Chopped onion 1/4 cup Large egg 1 Olive oil 1 tablespoon   You can also add some extra ingredients to make your salmon cakes recipe even better. Try adding fresh parsley, Worcestershire sauce, mayonnaise, or diced bell pepper. Remember, the liquid from the canned salmon can help hold the mixture together. With these ingredients, you’re ready to make delicious homemade salmon patties. Your family and friends will love them. Step-by-Step Instructions Preparation and Cooking Making homemade how to make salmon cakes is easier than you might think. Follow these step by step salmon cakes recipe to create delicious and flavorful salmon patties in no time: First, drain the liquid from the 14.5-ounce can of wild salmon and reserve it. Flake the salmon into a medium-sized bowl. Add in 2 eggs, ¼ cup of cornmeal (or breadcrumbs), ½ cup of shredded mozzarella cheese (or cheddar cheese), 2 tablespoons of Parmesan cheese, and ¼ cup of Panko-style breadcrumbs (or regular breadcrumbs). Mix all the ingredients together until well combined. If the salmon mixture appears too dry, add a bit of the reserved liquid to moisten it. Then, form the mixture into evenly sized patties, about 3-4 inches wide and ½ inch thick. Heat avocado oil (or any heat-proof oil) in a large cast iron skillet over medium heat. Carefully place the salmon patties into the hot oil and cook for 3-4 minutes per side, or until golden brown. Once cooked, transfer the how to make salmon cakes to a plate lined with paper towels to drain any excess oil. Serve your delicious homemade step by step salmon cakes recipe hot, and enjoy! Variations and Flavor Combinations While the classic salmon cakes recipe is tasty, you can try many flavors and ingredients. You can use different breadcrumbs, add fresh herbs and spices, and more. This lets you make salmon cakes just how you like them. Breadcrumb Choices: Try panko breadcrumbs for a crispy texture or gluten-free for a special diet. The breadcrumb you pick changes the taste and feel of your salmon cakes. Mix-In Additions: Add diced bell peppers, grated carrots, or herbs like dill and parsley. These add color, texture, and flavor to your patties. Seasoning Variations: Spice up your salmon cakes with cayenne pepper, Old Bay seasoning, or lemon pepper. Pick the spice level you like best. Sauce and Condiment Pairings: Pair your salmon cakes with sauces like tartar sauce, remoulade, or lemon wedges. These add a nice contrast to the savory salmon cakes.   Salmon Cakes Variation Key Ingredients Suggested Serving Asian-Style Salmon Cakes Soy sauce, ginger, scallions, sesame oil Serve with steamed rice and stir-fried vegetables Mediterranean Salmon Cakes Feta cheese, sun-dried … Read more

Cottage Cheese Recipes: Easy & Delicious Tasty Ideas

Cottage Cheese Recipes

Cottage cheese is a great ingredient because it’s low in calories and high in protein. This article will show you fun and tasty ways to use cottage cheese. You’ll find recipes for everything from savory toast to sweet pancakes and waffles. These cottage cheese recipes are quick, easy, and perfect for any meal. Key Takeaways Cottage cheese is a versatile ingredient that can be used in a variety of sweet and savory dishes.   Cottage cheese is high in protein, providing 28 grams per one-cup serving, making it a great addition to meals and snacks.   Cottage cheese recipes can be prepared in advance, emphasizing convenience in meal preparation.   The recipes featured showcase the versatility of cottage cheese, incorporating it into dishes like pancakes, dips, pasta, and more.   Cottage cheese dishes cater to different dietary preferences and can be enjoyed for breakfast, brunch, lunch, dinner, and parties.   The Versatility of Cottage Cheese Cottage cheese is a versatile dairy product. It can be used in many sweet and savory dishes. Its creamy texture and mild flavor make it perfect for different recipes. What Is Cottage Cheese? Cottage cheese is a fresh cheese that’s not aged. It’s made by adding acid to pasteurized milk. This causes the milk solids to separate from the whey. The curds are then cut into small pieces and drained. This leaves behind a soft, creamy cheese. Benefits of Cottage Cheese Recipes Cottage cheese is a nutritious ingredient. It’s high in protein, with 13 grams in a half-cup serving. a also low in calories and fat, making it great for a healthy diet. It’s a good source of calcium, potassium, selenium, and vitamin B12. These nutrients are important for health and well-being. Cottage cheese is used in many recipes. It’s found in dishes like skillet-baked omelets and cottage cheese chicken salad. It’s also used in sweet treats like cottage cheese pancakes and cottage cheese ice cream. Looking to add protein or boost your calcium intake? Cottage cheese is a versatile and nutritious choice. It can be easily added to your diet in many ways. Cottage Cheese Recipes Cottage cheese is great for many recipes, both sweet and savory. It’s perfect for easy cottage cheese toast or healthy meals. It’s a great choice for breakfast, snacks, or sides, making your dishes better. Cottage Cheese Toast Variations Enjoying cottage cheese on toast is simple and tasty. Top Ezekiel bread with 4% Good Culture cottage cheese, avocado, egg, and feta. This mix gives you about 26 grams of protein, 7 grams of fiber, and 400 calories. For something savory, add scallion eggs and crispy shallots to your cottage cheese toast. This adds about 23 grams of protein, 3 grams of fiber, and 260 calories. Another tasty choice is cottage cheese toast with smashed peas and crispy shallots, offering around 25 grams of protein, 5 grams of fiber, and 295 calories. Cottage Cheese Dips and Spreads Cottage cheese can be made into tasty dips and spreads. A whipped cottage cheese recipe takes about 10 minutes to make. It has 32 grams of protein per serving and is great as a snack or spread. It keeps well for up to 5 days when stored right. For a savory treat, try cottage cheese toast with bacon and scallions. It’s a protein-rich and crunchy delight. “Cottage cheese is a blank canvas that can be dressed up with a wide range of toppings and ingredients to create delicious, protein-packed meals and snacks.” Savory Cottage Cheese Recipe Cottage cheese is a staple in many households due to its versatility and health benefits. While often associated with sweet dishes, it excels in savory recipes as well, providing a creamy texture and a significant protein boost. Cottage Cheese Toast Variations Cottage cheese toast makes for a popular choice at breakfast or as a quick snack. It’s an efficient way to increase your protein intake. Numerous toppings can be used, such as avocado and egg, or scallions and crispy shallots. One delightful option is to layer cottage cheese with sliced tomatoes, fresh basil, and a drizzle of balsamic glaze on your toast. This combination makes for a flavorful way to kick off your morning. Cottage Cheese Dips and Spreads Cottage cheese is also ideal for crafting creamy dips and spreads. It works well in both sweet and savory recipes. Combine it with roasted red peppers, garlic, and lemon juice for a delicious dip. This dip pairs wonderfully with crunchy vegetables or whole-grain crackers. For a satisfying snack, blend cottage cheese with shredded zucchini, spinach, and cherry tomatoes. This option is not only high in protein but also packed with nutrients. Are you looking to enhance your breakfast or seeking a flavorful dip option? Savory cottage cheese recipes present countless possibilities. Experiment with different flavors and reap the health benefits of this adaptable dairy product. Sweet cottage cheese recipes Cottage cheese is great for sweet treats too. Try making cottage cheese pancakes and waffles for a protein-rich breakfast. They’re moist, creamy, and packed with protein, making them a great way to start your day. Cottage Cheese Pancakes and Waffles Start your day with cottage cheese pancakes and waffles. They’re creamy and full of protein, keeping you energized. Add your favorite fruits, maple syrup, or powdered sugar for a sweet treat. Whether you like pancakes or waffles, cottage cheese makes them better. They offer a sweet and nutritious mix, perfect for a high-protein breakfast. FAQ What is cottage cheese Recipes? Cottage cheese is a fresh cheese that doesn’t age. made by adding acid to pasteurized milk. This causes the milk solids to separate from the whey. These solids are then cut into small pieces and drained. This forms curds. What are the benefits of cottage cheese? Cottage cheese is a tasty, protein-rich food, with 13 grams per half cup low in calories, making it perfect for filling meals. Also packed with calcium, potassium, selenium, and B12. How can I use cottage cheese in recipes? Cottage cheese is great … Read more

seafood boil sauce recipe Simple Yet Flavorful

seafood boil sauce recipe

  Take your seafood boil sauce recipe to the next level with this amazing sauce. It’s loaded with garlic, butter, and a touch of spice. This sauce is perfect for crab, shrimp, or any seafood feast. It makes snow crab legs, lobster tails, and shellfish taste even better. Key Takeaways Seafood boil sauce is a must-have for any seafood boil or shellfish feast This recipe features a blend of butter, garlic, and Cajun seasoning for maximum flavor The sauce comes together quickly in just 20 minutes with simple ingredients Customize the heat level by adjusting the amount of Cajun seasoning Leftovers can be stored in the fridge for up to 2 weeks What is a Seafood Boil Sauce? A Rich and Flavorful Addition A seafood boil sauce is a rich and flavorful addition to seafood boils. It makes the dish even better. This sauce is made with melted butter, garlic, onion, and Cajun and Old Bay seasonings. It’s a luxurious sauce that goes well with shrimp, crab, lobster, and more. This seafood dipping sauce or seafood butter sauce makes any seafood boil better. The cajun butter sauce adds a deep flavor to every bite. It makes the dish even more enjoyable. Nutritional Information (per serving) Value Calories 182kcal Carbohydrates 4g Protein 1g Fat 19g Saturated Fat 12g Sodium 172mg Fiber 1g Sugar 2g   The recipe for seafood boil sauce includes 10 garlic cloves, Old Bay seasoning, smoked paprika, cayenne pepper, black pepper, salt, and dried thyme. It also has 2 12 oz beers for extra flavor. Why You Need This Sauce If you love seafood boil, you’ll adore this seafood boil sauce. It brings a rich, buttery taste to your seafood dishes. It also makes the seafood’s natural flavors pop. Whether it’s a classic seafood boil, crab legs, or shrimp, this sauce unlocks the seafood’s full flavor. This seafood boil sauce is a game-changer. It combines spices like Old Bay Seasoning and lemon pepper for a complex yet delightful taste. The buttery, garlic-infused sauce enhances the seafood’s natural flavors, adding richness and depth. This sauce is also super versatile. Use it as a dipping sauce, a topping, or even a marinade for grilled or baked seafood. Its flexibility makes it a must-have in any seafood lover’s kitchen. Looking to elevate your seafood game and bring your favorite dishes to new heights? Then, try this seafood boil sauce. It’s the secret ingredient that will transform your seafood experience and leave you wanting more. Ingredients for the Perfect Seafood Boil Sauce Recipe Simple Yet Flavorful The ingredients for this seafood boil sauce recipe are easy to find but pack a punch. It starts with melted butter, mixed with diced onion and garlic for a rich aroma. Then, Cajun seasoning and Old Bay are added, bringing a mix of savory, spicy, and herbal tastes. Brown sugar, red pepper flakes, and lemon juice are also included. They balance the sauce’s richness and add depth. With just a few items from your pantry, you can make a seafood boil sauce that will make your seafood dishes shine. Ingredient Quantity Unsalted Butter 4 sticks (16 oz) Onion, diced 1 medium Garlic, minced 3 cloves Cajun Seasoning 1 tsp Old Bay Seasoning 1 tsp Brown Sugar 2 tbsp Red Pepper Flakes 1 tsp Lemon Juice 2 tbsp   This seafood boil sauce recipe is great for dipping, topping grilled seafood, or as a marinade. The mix of butter, Cajun and Old Bay, and a hint of sweetness and acidity is perfect for seafood. It’s a versatile sauce that enhances many seafood dishes. seafood boil sauce recipe Step-by-Step Instructions Making the perfect seafood boil sauce is easy. Start by melting butter in a big skillet over medium heat. Once it’s melted, add diced onion and cook for 5 minutes until it’s soft. Then, add minced garlic and cook for 3 more minutes. This lets the flavors mix well. Now, it’s time to add the seasonings. Put in Cajun seasoning, Old Bay, onion powder, brown sugar, and red pepper flakes. Let it cook for 5 minutes to blend the flavors. After that, add chicken stock and let it simmer for 6-8 minutes. This will make the sauce thick and tasty. Finally, take the skillet off the heat. Mix in lemon juice and chopped parsley. Your seafood boil sauce recipe is now ready. It’s perfect for drizzling over or serving with seafood. Ingredient Quantity Unsalted Butter 4 oz Onion, diced 1 medium Garlic, minced 3 cloves Cajun Seasoning 1 tbsp Old Bay Seasoning 1 tsp Onion Powder 1 tsp Brown Sugar 1 tbsp Red Pepper Flakes 1/2 tsp Chicken Stock 1/2 cup Lemon Juice 2 tbsp Chopped Parsley 2 tbsp   seafood boil sauce recipe Customizing the Heat Level This seafood boil sauce recipe lets you adjust the spice to your liking. It starts with 1 tablespoon of red pepper flakes, giving it a mild to medium heat. If you want it spicier, just add more red pepper flakes or a bit of hot sauce. If you’re not a fan of heat, you can reduce the red pepper flakes or skip them. The trick is to taste the sauce as you go. This way, you can control the heat in the seafood boil sauce to your taste. Playing with the spice level is part of the fun of making your own seafood boil sauce. Feel free to adjust the spice level to make the seafood boil sauce spicy or milder, based on your taste. Seafood Boil Sauce Recipe Alternatives Variations to Try The seafood boil sauce recipe is tasty, but there are many other options. You can change the flavors to match your taste or the event. Try using different seasonings like Old Bay or Creole instead of Cajun. Adding white wine or Worcestershire sauce can make the sauce richer. Want more heat? Add more red pepper flakes or hot sauce. A bit of brown sugar can cool it down and add sweetness. Don’t forget to try new … Read more

Delicious Hawaiian Banana Bread Recipe | Easy to Make

Hawaiian Banana Bread

Delicious Hawaiian Banana Bread Recipe | Easy to Make Experience the taste of Hawaii with our Hawaiian banana bread recipe. It’s a tropical twist on the classic, with ripe bananas, crushed pineapple, and coconut. This easy recipe makes a moist and flavorful loaf that’s perfect for any time. Looking for a pineapple banana bread or a coconut banana bread with a Hawaiian vibe? This recipe has it all. It’s sure to make your taste buds happy and leave you wanting more. Key Takeaways Tropical twist on classic banana bread with pineapple and coconut Easy-to-make recipe that yields either 2 loaves or 25 muffin tops Incorporates ripe bananas, crushed pineapple, and shredded coconut for authentic Hawaiian flavors Highly-rated recipe with 100% positive feedback Versatile recipe with dairy-free and gluten-free options available Tropical Banana Bread with Pineapple and Coconut Try this Hawaiian banana bread recipe for a taste of the islands. It combines pineapple and coconut for a moist and flavorful loaf. It’s great for breakfast, dessert, or a snack anytime. The secret to this tropical banana bread is ripe bananas, crushed pineapple, and shredded coconut. These ingredients make a bread full of Hawaii’s vibrant flavors. It’s perfect for any occasion or just to enjoy a little paradise. Baking this Hawaiian dessert recipe is easy. The result is a wonderful island-inspired baking experience. Every slice brings tropical notes and feels like a sunny island getaway. To make this banana bread with pineapple, you need a few ingredients. You’ll need ripe bananas, crushed pineapple, shredded coconut, and more. The recipe is simple and makes a delicious loaf to share. Enjoy the tropics with this Hawaiian banana bread recipe. It’s perfect for hawaiian dessert recipes or adding island flair to your baking. It will satisfy your cravings and take you to a tropical paradise. Ingredients for Hawaiian Banana Bread Recipe This Hawaiian banana bread recipe is packed with tropical flavors. It uses ripe bananas, crushed pineapple, and shredded coconut. These ingredients make the bread moist and full of Hawaiian taste. Ripe Bananas The recipe needs 3 mashed ripe bananas. They add sweetness and moisture to the bread. Ripe bananas are key for a moist and flavorful banana bread. Crushed Pineapple Crushed pineapple adds a tropical twist to the bread. It balances the sweetness of the bananas. This makes the bread a perfect tropical treat. Shredded Coconut Unsweetened shredded coconut is a must in this recipe. It adds a nice texture and coconut flavor. This enhances the bread’s island-inspired taste. Ingredient Quantity Ripe Bananas 3 mashed Crushed Pineapple 1 cup drained Shredded Coconut 1/2 cup unsweetened All-Purpose Flour 1.5 cups Baking Powder 1 teaspoon Baking Soda 1/2 teaspoon Salt 1/4 teaspoon Ground Cardamom 1/2 teaspoon Unsalted Butter 1/2 cup Granulated Sugar 1 cup Eggs 2 Vanilla Extract 1.5 teaspoons   How to Make Easy Hawaiian Banana Bread Making a tasty Hawaiian banana bread is easy and quick. Just follow these simple steps to enjoy the tropical taste of this island treat. Hawaiian Banana Bread Step-by-Step Instructions First, preheat your oven to 350°F (175°C). Grease a 1.5-quart loaf pan with butter or non-stick spray. In a big mixing bowl, mix 1/2 cup of softened butter and 1 cup of sugar until it’s light and fluffy. Then, beat in 2 eggs, one at a time, until they’re fully mixed in. Mash 1 ripe banana and add it to the mix, along with 20 ounces of crushed pineapple in juice. Mix until it’s all combined. In another bowl, whisk together 2 cups of all-purpose flour, 1 teaspoon of baking powder, 1/2 teaspoon of baking soda, and 1/4 teaspoon of salt. Slowly add the dry ingredients to the wet ingredients. Mix gently until just combined, without overmixing. Stir in 1/4 cup of sweetened shredded coconut until it’s spread out evenly. Pour the batter into the prepared loaf pan and smooth the top. Bake for 1 hour, or until a toothpick inserted into the center comes out clean. Let the Hawaiian banana bread cool in the pan for 10 minutes. Then, move it to a wire rack to cool completely. Nutrition Facts (per slice) Value Calories 251 kcal Carbohydrates 39 g Protein 4 g Fat 9 g Saturated Fat 6 g Cholesterol 55 mg Sodium 181 mg Fiber 1 g Sugar 21 g   Follow these steps to make a delicious Hawaiian banana bread. Enjoy this pineapple banana bread as a sweet treat or with your favorite island dishes. Moist and Flavorful hawaiian banana bread recipe Enjoy the tropical flavors of Hawaii with this moist and flavorful Hawaiian banana bread recipe. It combines ripe bananas, crushed pineapple, and shredded coconut for a sweet and satisfying taste. This quick bread is tall, tender, with a golden crust and soft inside. This Hawaiian banana bread is great for breakfast, snacks, or dessert. It’s easy to make and makes a lot, perfect for sharing or saving. The recipe uses ripe bananas for natural sweetness and moisture. Adding crushed pineapple and shredded coconut boosts the tropical flavors, making every bite a trip to the islands. Baking at 350°F for 60-70 minutes makes this Hawaiian banana bread quick and easy. The result is a moist, flavorful loaf that will be a family favorite. For the best taste, store the Hawaiian banana bread in an airtight container in the fridge for 1-2 days. Or freeze it for up to a month. Enjoy it sliced with butter or cream cheese for a tasty snack or dessert. “This Hawaiian banana bread is a tropical delight! The combination of ripe bananas, pineapple, and coconut creates a flavor explosion in every bite.” Indulge in the flavors of the islands with this moist and delicious Hawaiian banana bread recipe. It’s perfect for those craving tropical tastes or looking for a new quick bread to try. This recipe will satisfy your cravings and delight your taste buds. Quick Hawaiian Banana Bread Recipe Without Yeast The Hawaiian banana bread recipe is quick and easy. It doesn’t need yeast because baking powder and … Read more

Chicken Salad Chick Grape Salad Recipe: Easy & Tasty

chicken salad chick grape salad recipe

Get ready to love the Chicken Salad Chick Grape Salad Recipe! It’s a favorite from the Chicken Salad Chick menu. The dressing is creamy and sweet, covering plump, juicy grapes. You can make this easy grape salad in just 15 minutes. It’s great for potlucks, picnics, and family gatherings. Your guests will love the mix of flavors. They’ll want more! Key Takeaways for Chicken Salad Chick Grape Salad Recipe Creamy dressing made with cream cheese, sour cream, sugar, and vanilla Tossed with fresh, juicy seedless grapes (both red and green) Topped with crunchy pecans and brown sugar Quick and easy to prepare in just 15 minutes Serves a crowd of 15 people, making it perfect for events and gatherings   What is Chicken Salad Chick Grape Salad recipe? Chicken Salad Chick Grape Salad is a favorite in the South. It’s a mix of juicy grapes and a creamy dressing. The dressing includes cream cheese, sour cream, sugar, and vanilla. It’s topped with brown sugar and pecans for a crunchy touch. Why is it So Popular? Many love the Grape Salad for its sweet and tangy taste. It’s perfect for gatherings because it pleases everyone. People say it’s “like crack” and “crazy-good,” finding it both indulgent and refreshing. The salad is great as a side or a light dessert. It’s easy to make and can be prepared ahead of time. This makes it a hit at parties and family events. The Chicken Salad Chick Grape Salad is a Southern favorite. It’s loved for its taste, versatility, and simplicity. It’s a go-to for both sides and desserts, always a hit with everyone. Ingredients and Preparation Making the Chicken Salad Chick Grape Salad is easy. You’ll need cream cheese, sour cream, sugar, vanilla extract, and grapes. Also, brown sugar and chopped pecans are important. Start by mixing cream cheese, sour cream, sugar, and vanilla extract until smooth. Then, add 5 pounds of grapes. Make sure they’re well coated with the dressing. 3 packages (8 ounces each) of cream cheese, at room temperature 2½ cups of sour cream 1¼ cups of sugar 1 tablespoon of vanilla extract 5 pounds of seedless grapes, half red and half green ½ cup of brown sugar ½ cup of finely chopped pecans   Chill the salad for at least 24 hours. This lets the flavors mix well. Just before serving, add brown sugar and pecans for a nice crunch. Ingredient Amount Cream cheese 24 ounces (3 packages) Sour cream 2½ cups Sugar 1¼ cups Vanilla extract 1 tablespoon Seedless grapes 5 pounds (half red, half green) Brown sugar ½ cup Pecans, chopped ½ cup The Chicken Salad Chick Grape Salad is a mix of creamy, sweet, and crunchy. It’s a hit with everyone. chicken salad chick grape salad recipe If you love Chicken Salad Chick grape salad, you’re in for a treat! This copycat recipe lets you make it at home. The secret is the creamy and sweet mix. To make this easy grape salad recipe, you’ll need a few ingredients. You’ll need 8 ounces of softened cream cheese, 1 cup of sour cream, and 3/4 cup of white granulated sugar. Also, 2 teaspoons of vanilla, 2-3 pounds of seedless green and red grapes, 1/4 cup of finely chopped pecans, and 1/4 cup of brown sugar. In a large bowl, beat the cream cheese, sour cream, white sugar, and vanilla until smooth and creamy. Gently fold in the grapes, making sure they are evenly coated. Chill the salad for at least 30 minutes. Just before serving, sprinkle the top with the chopped pecans and brown sugar.   This copycat chicken salad chick grape salad is great as a side or dessert. It’s a light and refreshing snack or pairs well with meals. The creamy dressing, sweet grapes, and crunchy pecans make it a hit. Prep Time Total Time Servings Calories per Serving 10 minutes 10 minutes 10 people 197 kcal “This grape salad dessert is one of the most popular options at Chicken Salad Chick restaurants.” Serving Suggestions for chicken salad chick grape salad recipe Chicken Salad Chick’s Grape Salad is perfect for many occasions. It’s great as a side for grilled meats or as a refreshing touch for brunch or showers. This grape salad recipe will surely impress. Meal Pairings The Grape Salad goes well with grilled chicken or balsamic pork chops. It also pairs well with burgers. For brunch or showers, try it with a Sausage & Cream Cheese Crescent Breakfast Casserole. This salad is also great with Southern dishes and at BBQs or potlucks. Its versatility makes it a perfect side for many meals and events. Meal Pairing Dish Savory Grilled Meats Savory Grilled Chicken, Grilled Balsamic Pork Chops Burgers Classic Burger Brunch or Shower Sausage & Cream Cheese Crescent Breakfast Casserole Southern-Inspired Dishes Fried Chicken, Collard Greens, Cornbread Backyard BBQ or Potluck Grilled Ribs, Coleslaw, Baked Beans For the best taste, serve the Grape Salad chilled. Add brown sugar and toasted pecans on top. This side dish will be a hit at any gathering. Variations and Tips for chicken salad chick grape salad recipe The classic Chicken Salad Chick grape salad is a hit, but you can make it your own. Try mixing green and red seedless grapes for a colorful twist. The different colors and sweetness levels make it both interesting and pretty. Adding toasted coconut flakes is a great idea. They add a sweet, nutty crunch that pairs well with the grapes. If you like nuts, swap pecans for walnuts or sliced almonds for a new texture. Ingredient Variation Grapes Use a mix of green and red seedless grapes Nuts Substitute pecans with walnuts or sliced almonds Coconut Add toasted coconut flakes   When making the grape salad, use softened cream cheese for smooth blending. Dry the grapes well before adding them to the dressing. This keeps the salad from getting too wet. For the best crunch, add pecans and brown sugar just before serving.The grape salad can be made up … Read more